HARDWARE 구성
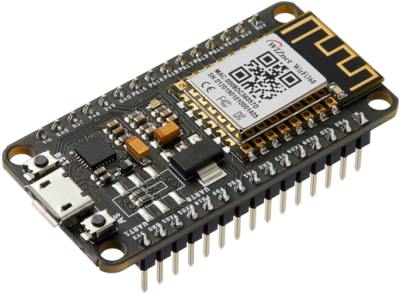
Wiznet WizFi360-EVB-Mini
http://wizwiki.net/wiki/doku.php/products:wizfi360:board:wizfi360-evb-mini:start
products:wizfi360:board:wizfi360-evb-mini:start [Document Wiki]
wizwiki.net
+
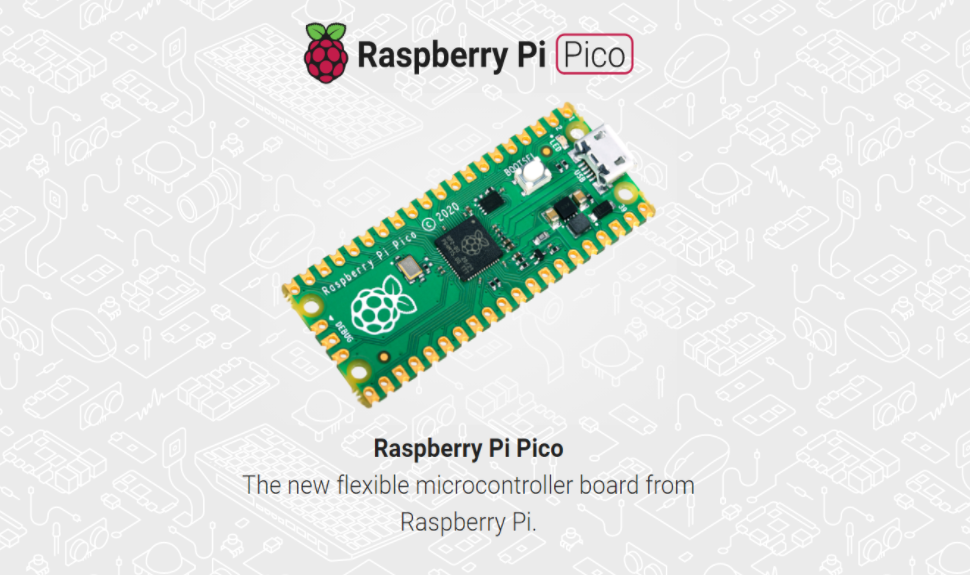
Raspberry Pi Pico RP2040
https://www.raspberrypi.org/documentation/rp2040/getting-started/#board-specifications
https://www.raspberrypi.org/documentation/rp2040/getting-started/#board-specifications
Documentation Documentation for Raspberry Pi Pico and other RP2040-based boards. An RP2040-based microcontroller boardA microcontroller by Raspberry PiUsing RP2040 microcontrollers to build boards and products C/C++ development with Raspberry Pi Pico and o
www.raspberrypi.org
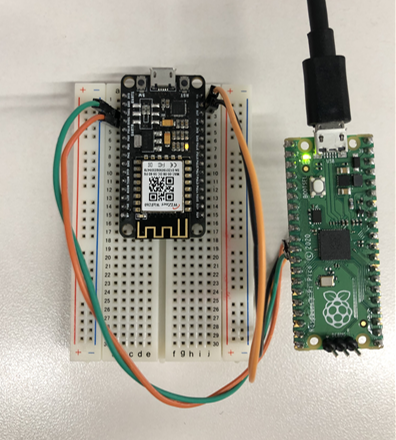
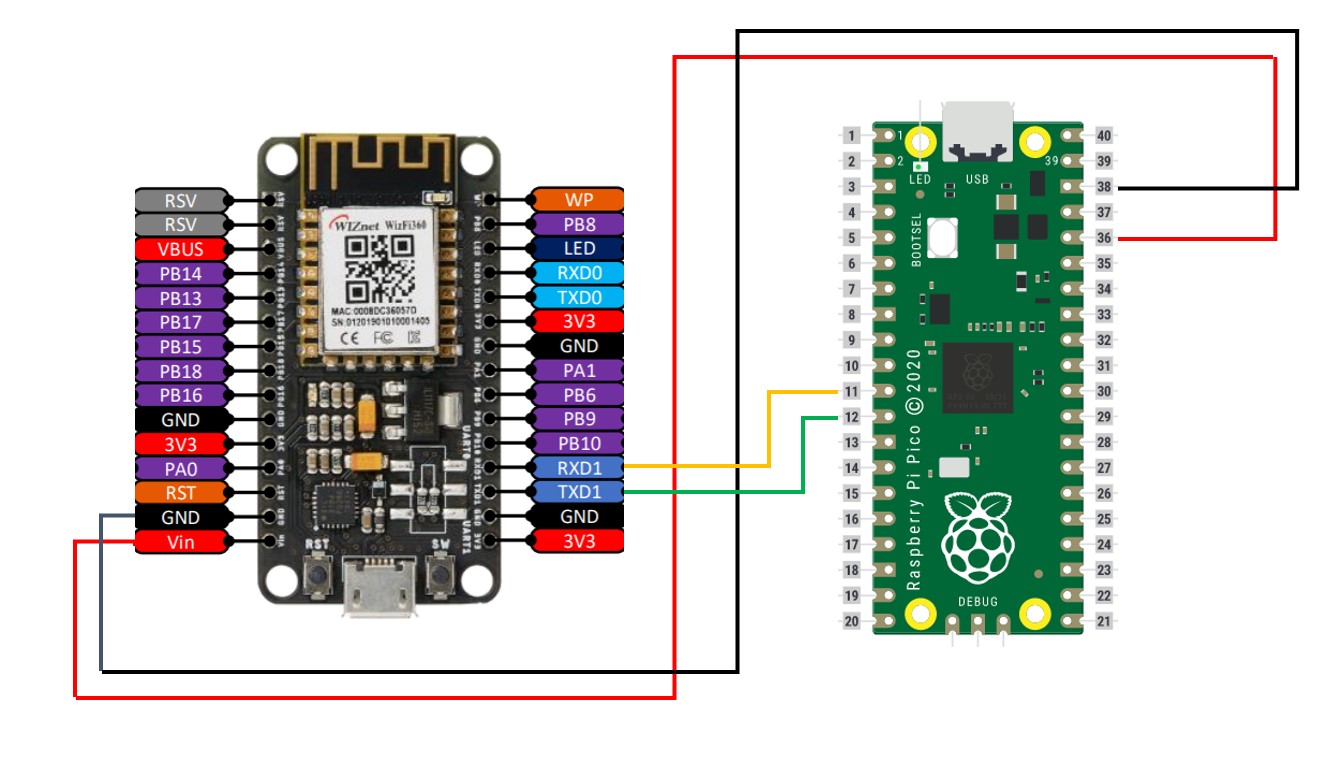
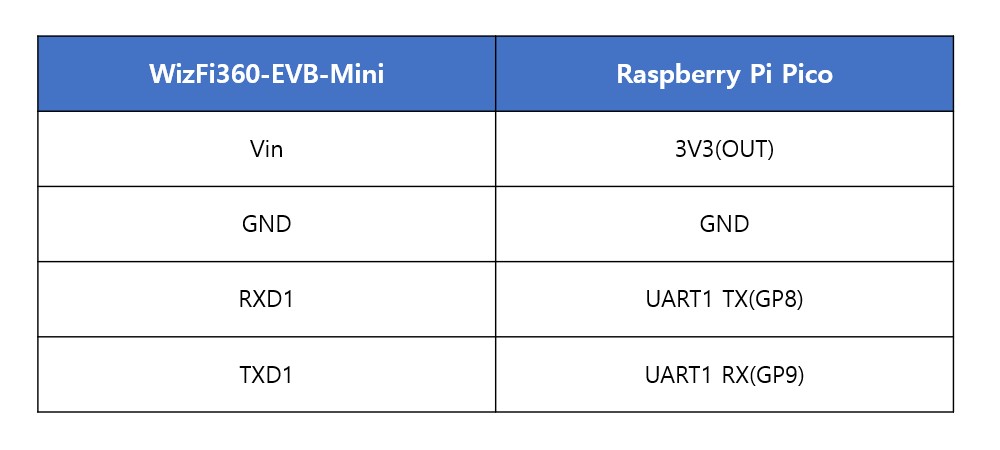
Raspberry pi Pico + WIZ850io(W5500) 하드웨어 연결


WizFi360의 WiFi동작모드는 총 3 가지
| - Station mode - SoftAP mode - Station + SoftAP mode |
Station mode
WizFI360 이 AP(공유기)에 접속하는 방식. AP로부터 DHCP 를 통해 IP 를 할당 받거나 Static IP 를 설정하여 사용
SoftAP mode
WizFI360 이 AP로써 동작하며, 다른 장치들이 Station 으로써 WizFi360 에 연결. WizFi360 은 연결된 장치들에 IP 를 할당하며, Local 망에서의 통신만 가능.
Station + SoftAP mode
WizFi360 이 Station, AP 역할 모두 가능.

1. Environment Setting
1-1. Hercules 설치해서 서버 구축하기
https://iotedition.tistory.com/4
WizFi360-EVB-Mini 무선 모듈 + AT command
Wizfi360 와이파이 모듈 기반의 미니 EVB보드 https://wizwiki.net/wiki/doku.php/products:wizfi360:board:wizfi360-evb-mini:start products:wizfi360:board:wizfi360-evb-mini:start [Document Wiki] wizwiki.n..
iotedition.tistory.com
1-2. MicroPython Thonny IDE 설치
Thonny, Python IDE for beginners
Download version 3.3.10 for Windows • Mac • NB! On Windows you may receive a warning dialog from Defender. Just click "More info" and"Run anyway". Thonny Python IDE for beginners Features Easy to get started. Thonny comes with Python 3.7 built
thonny.org

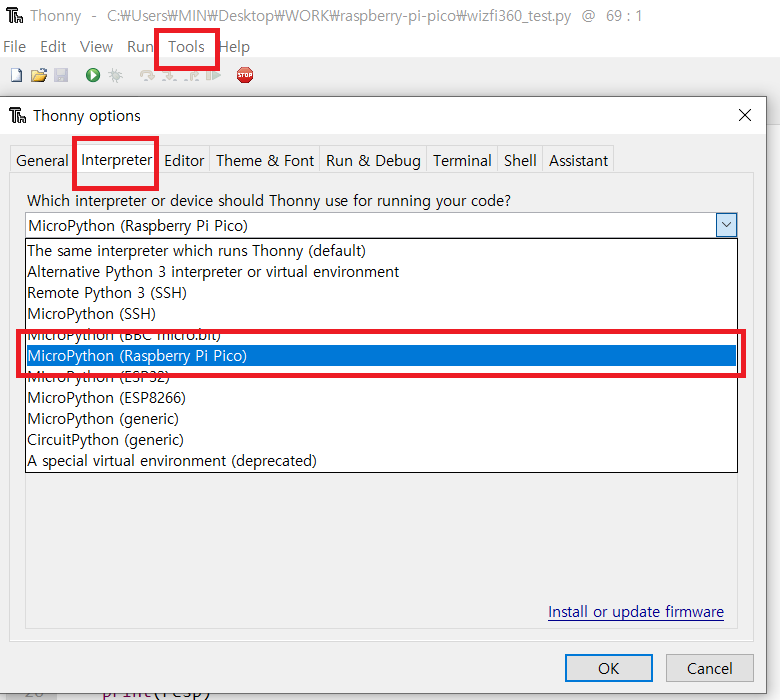
Thonny 설치 후 Raspberry Pi Pico 설정

Tools -> Options ->Interpreter

2. Wizfi360을 통해 WiFi 구성
2-1. Hercules를 실행하여 Server Open
Port 번호 5000.

2. MicroPython WizFi360 AT command code
| import os, sys import utime from machine import UART,Pin print(os.uname()) led = machine.Pin(25, machine.Pin.OUT) led.value(0) utime.sleep(0.5) led.value(1) #Functions def sendCMD_waitResp(cmd, timeout=3000): print("CMD: " + cmd) uart.write(cmd) waitResp(timeout) print() def waitResp(timeout=3000): prvMills = utime.ticks_ms() resp = b"" while (utime.ticks_ms()-prvMills) < timeout: if uart.any(): resp = b"".join([resp, uart.read(1)]) print(resp) #Uart info #uart = machine.UART(0, baudrate=115200, tx=Pin(0), rx=Pin(1)) uart = machine.UART(1, baudrate=115200, tx=Pin(8), rx=Pin(9)) print("UART Setting...") print(uart) #AT command Test sendCMD_waitResp("AT\r\n") #AT sendCMD_waitResp("AT+GMR\r\n") #AT ver utime.sleep(1) #sendCMD_waitResp("AT+RST\r\n") #reset sendCMD_waitResp("AT+CWMODE_CUR=1\r\n") # Station Mode sendCMD_waitResp("AT+CWDHCP_CUR=1,1\r\n") #DHCP on utime.sleep(1) sendCMD_waitResp('AT+CWJAP_CUR="SSID","PASSWORD"\r\n') #AP connecting sendCMD_waitResp("AT+CIPSTA_CUR?\r\n") #network chk #TCP Client sendCMD_waitResp("AT+CIPMUX=1\r\n") sendCMD_waitResp('AT+CIPSTART=0,"TCP","YOUR_IP_ADDRESS",5000\r\n') print("connected...") print("RPi-PICO with WizFi360") Data = bytes() while True: if uart.any()> 0: Data += uart.read(10) print("read...") utime.sleep(0.5) led.value(0) print(Data.decode('utf-8')) led.value(1) |
3. Pico WizFi360 AT command 실행 결과
WizFi360 Client_AT command

PC Server connect

'IT' 카테고리의 다른 글
| AX2 - WIZnet TCP/UDP 속도 측정 Tool (0) | 2021.07.09 |
|---|---|
| W5500 Ethernet Shield(Raspberry Pi Pico) 서버 + Wizfi360 WiFi Module (Raspberry Pi Pico)클라이언트 온도 측정 데이터 전달 (0) | 2021.06.17 |
| WizFi360-EVB-Mini 무선 모듈 + AT command (0) | 2021.06.08 |
| Raspberry Pi Pico + WIZ850io(W5500) Ethernet 환경 구성하기 - (2) (0) | 2021.06.03 |
| Raspberry Pi Pico + WIZ850io(W5500) Ethernet 환경 구성하기 - (1) (0) | 2021.06.03 |


